Get Started with Docker (Hasura & Citus - Hyperscale)
Table of contents
Try it out
Pre-requisites
- Docker
- Docker Compose
- An existing Citus database
Step 1: Get the docker-compose file
Get the Hasura docker-compose file:
# in a new directory run
wget https://raw.githubusercontent.com/hasura/graphql-engine/stable/install-manifests/docker-compose/docker-compose.yaml
# or run
curl https://raw.githubusercontent.com/hasura/graphql-engine/stable/install-manifests/docker-compose/docker-compose.yaml -o docker-compose.yaml
Step 2: Run Hasura GraphQL engine
The following command will run Hasura along with a Postgres database required for its functioning.
$ docker-compose up -d
Check if the containers are running:
$ docker ps

CONTAINER ID IMAGE                 ... CREATED STATUS PORTS          ...
097f58433a2b hasura/graphql-engine ... 1m ago  Up 1m  8080->8080/tcp ...
b0b1aac0508d postgres              ... 1m ago  Up 1m  5432/tcp       ...

Please do note that you will see a Postgres database running, which is used by Hasura to store its configuration (Hasura metadata).
Step 3: Open the Hasura console
Head to http://localhost:8080/console to open the Hasura console.
Step 4: Add your Citus database as a source to Hasura
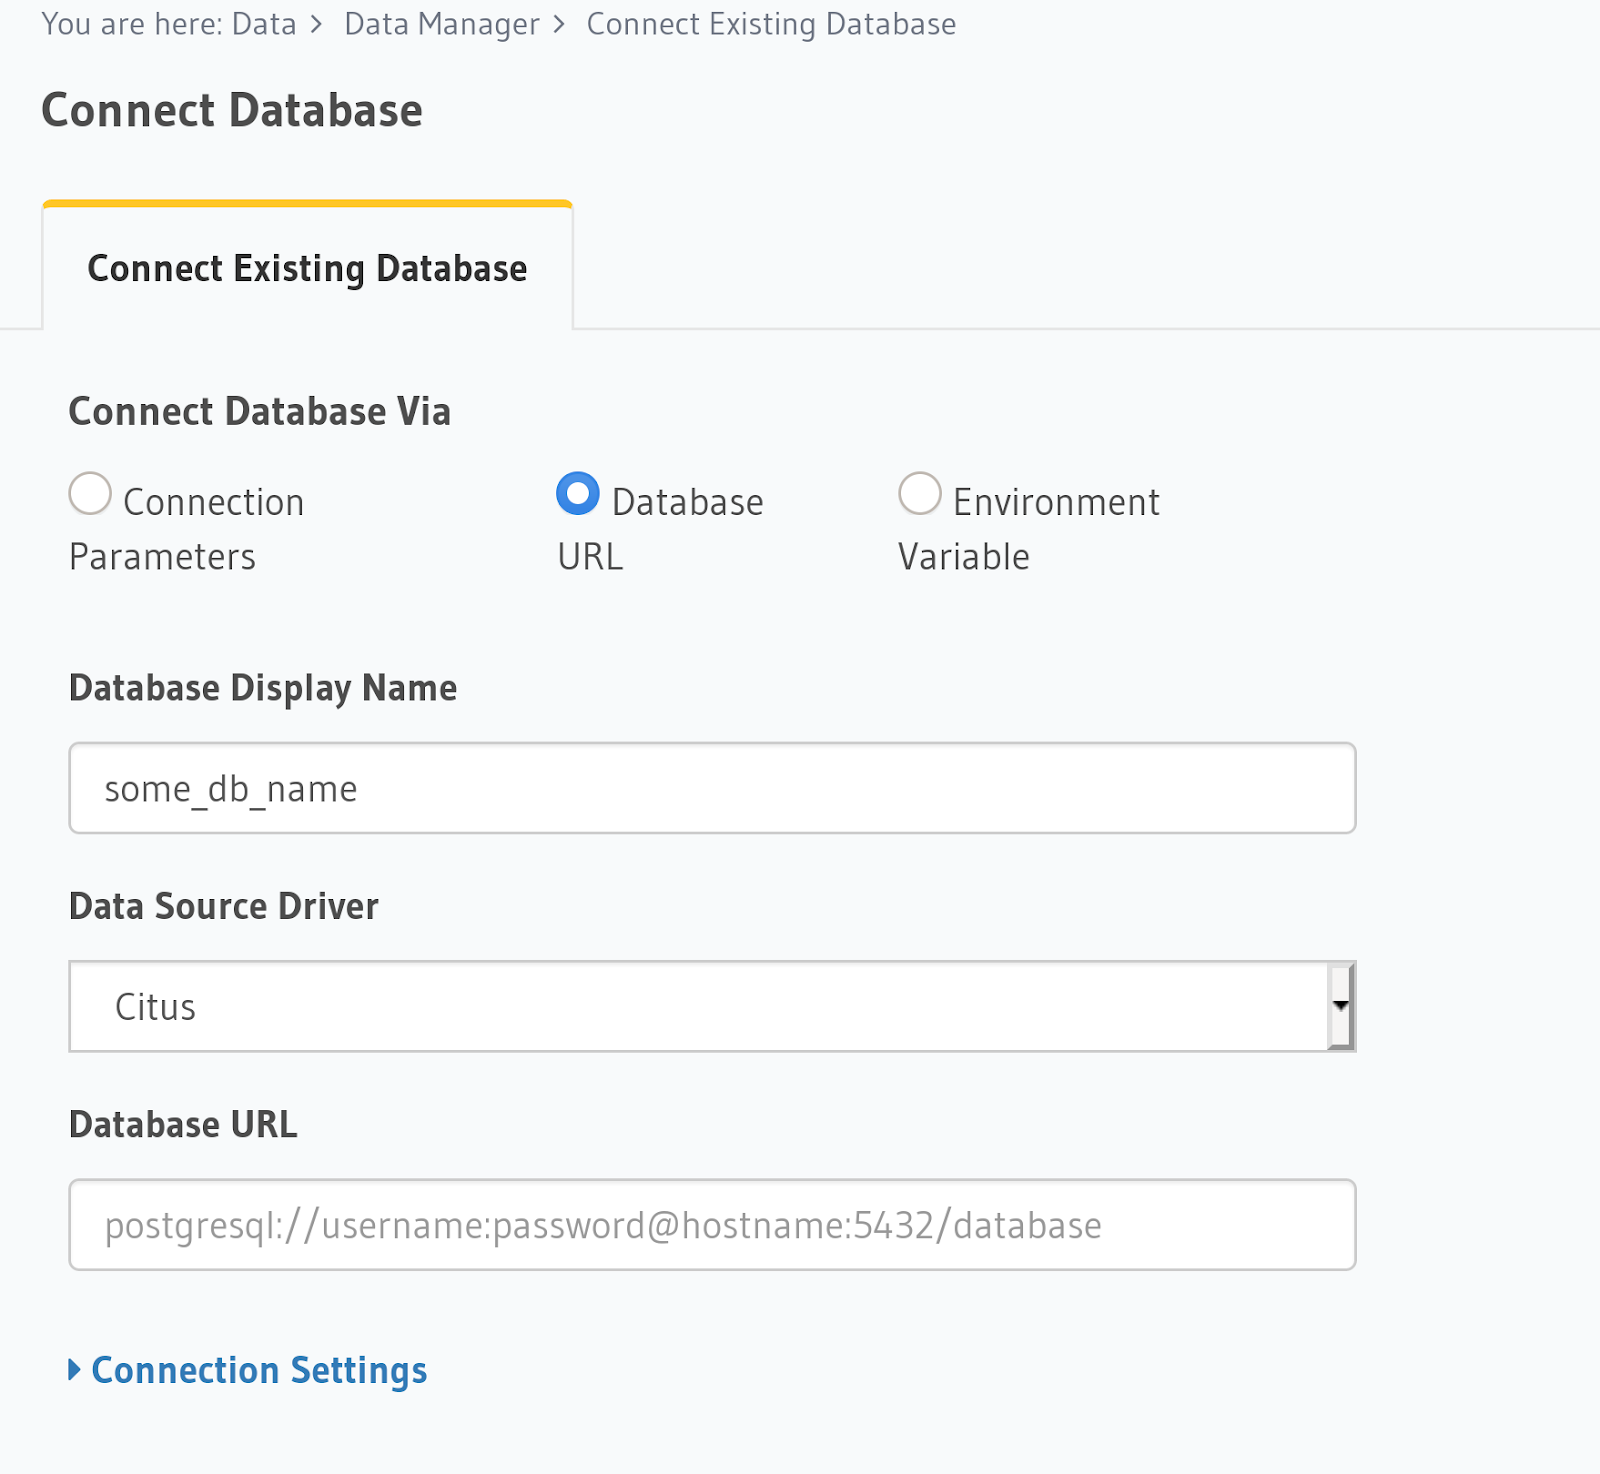
In the Data > Data Manager > Connect Existing Database section on the console,
select Citus from the Data Source Driver dropdown and add the connection string
directly or through an environment variable. As Citus speaks the same protocol as
Postgres, the connection string will start with postgres://, i.e, there is no
difference between Citus’s connection strings and Postgres’s connection strings.

If you’re testing Hasura with Citus running locally, read this guide on Docker networking in case you’re not sure how to make sure that your Citus database is reachable from the Hasura docker container on Linux, Mac or Windows.
Once you add the database, you’ll see your database pop up on the sidebar.
Step 5: Track existing tables or create new tables
If you have existing tables, head to the database page by clicking on the database name on the sidebar. You should see a list of tables.
Track tables selectively or all of them so that Hasura can introspect the tables and create the corresponding GraphQL schema.
If you have foreign keys, you’ll also see suggested relationships. Again, you can choose to track them selectively or all at once.
If you don’t have existing tables, go ahead and add new tables and data and try out some queries, just like with a regular Postgres database.
Step 6: Try out a GraphQL query
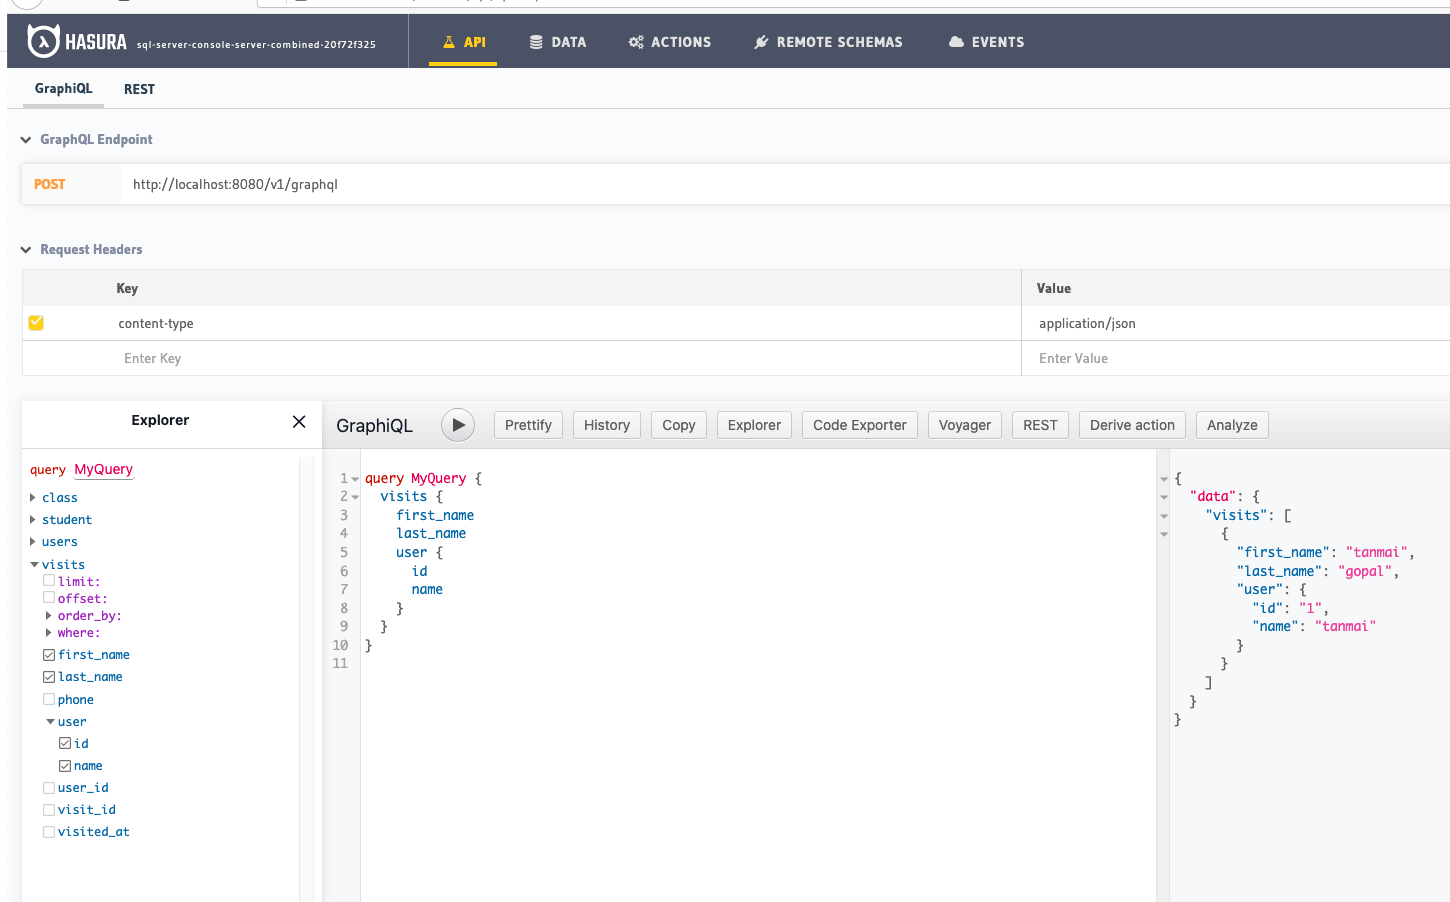
Head to the GraphiQL tab in the console and try running a GraphQL query! Use the explorer sidebar on GraphQL to get help in creating a GraphQL query.

Keep up to date
Hasura supports queries, subscriptions, relationships and permissions on Citus - Hyperscale.
Please watch this space to get the latest docs on how you can try these features out via the console or by manipulating metadata in JSON/YAML directly.
If you’d like to stay informed about the status of Citus support, subscribe to our newsletter and join our discord!
