Get Started with Hasura Cloud & MS SQL Server
Table of contents
Try it out
Step 1: Create an account on Hasura Cloud and create a new Hasura Project
Navigate to cloud.hasura.io, and create a new Hasura Cloud account.
Once you create a project on Hasura Cloud, hit the “Launch Console” button to open the Hasura Console for your project.

Step 2: Add your SQL Server database as a source to Hasura
Head to the Data > Manage databases section on the console to add
your MS SQL Server as a source to Hasura. You’ll need your ODBC connection string. Make sure that
your ODBC driver is set to version 17.
Here’s an example of what your connection strings might look like with a SQL server database on Azure SQL Serverless:
Driver={ODBC Driver 17 for SQL Server};Server=tcp:hasura-test.database.windows.net,1433;Database=db-name;Uid=username;Pwd=password;Encrypt=yes;TrustServerCertificate=no;Connection Timeout=30;
Make sure your SQL server database is reachable by Hasura Cloud:
- Allow public connections or whitelist the Hasura Cloud IP on your SQL Server firewall: This is good for testing and will allow you to try Hasura out with your database quickly!
- VPC peering: VPC peering and private network access is available on Hasura Cloud paid tiers: Recommended for production. Get in touch with us if you’d like to try this out against your existing databases!
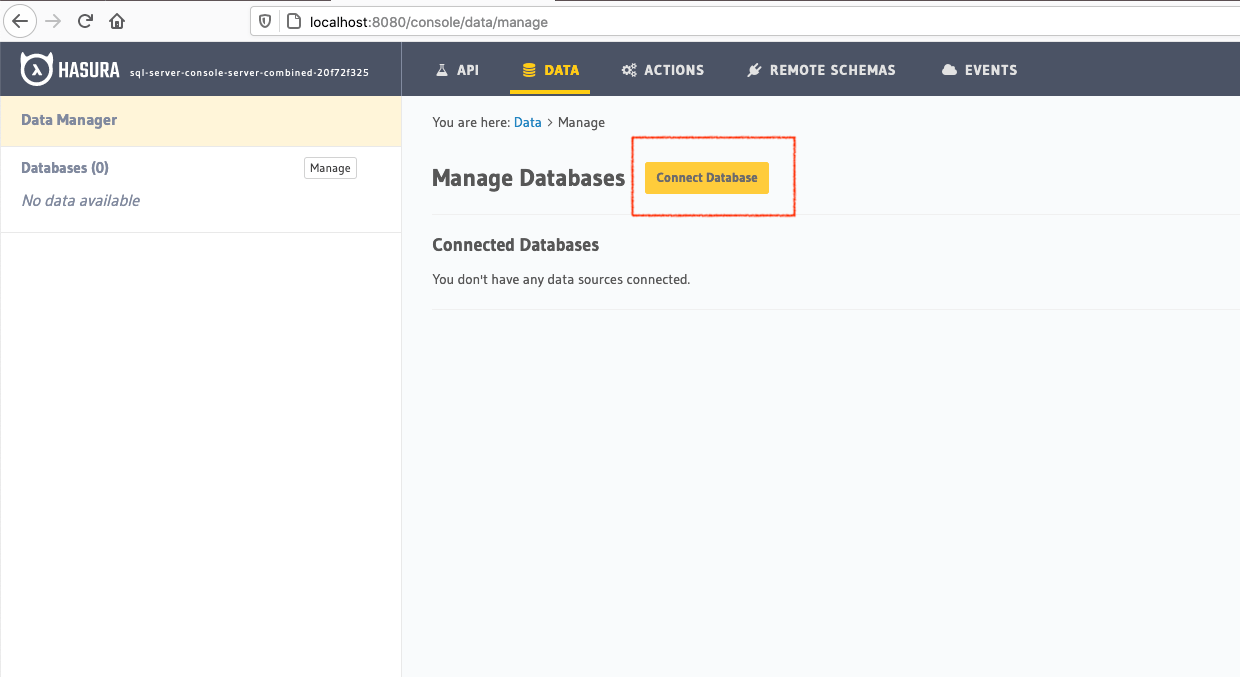
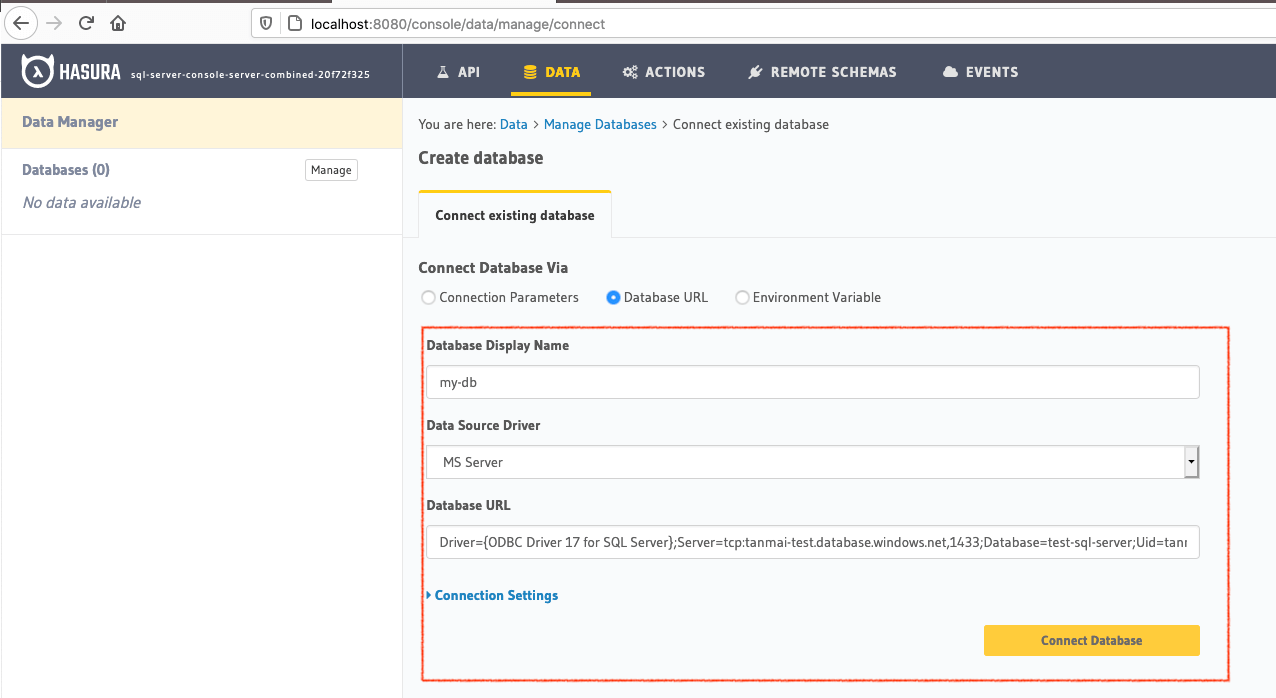
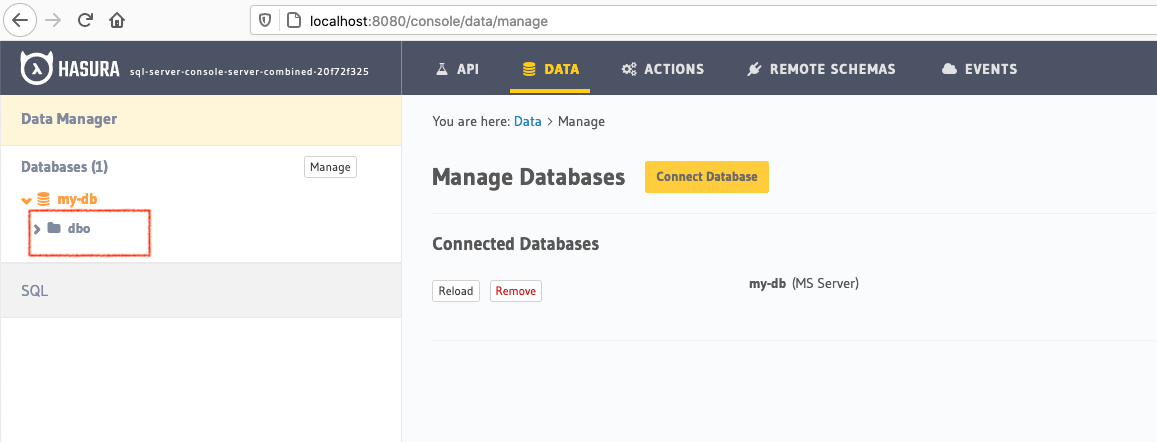
Once you add the database, you’ll see your database pop up on the sidebar.
Step 3: Option 1: Track existing tables
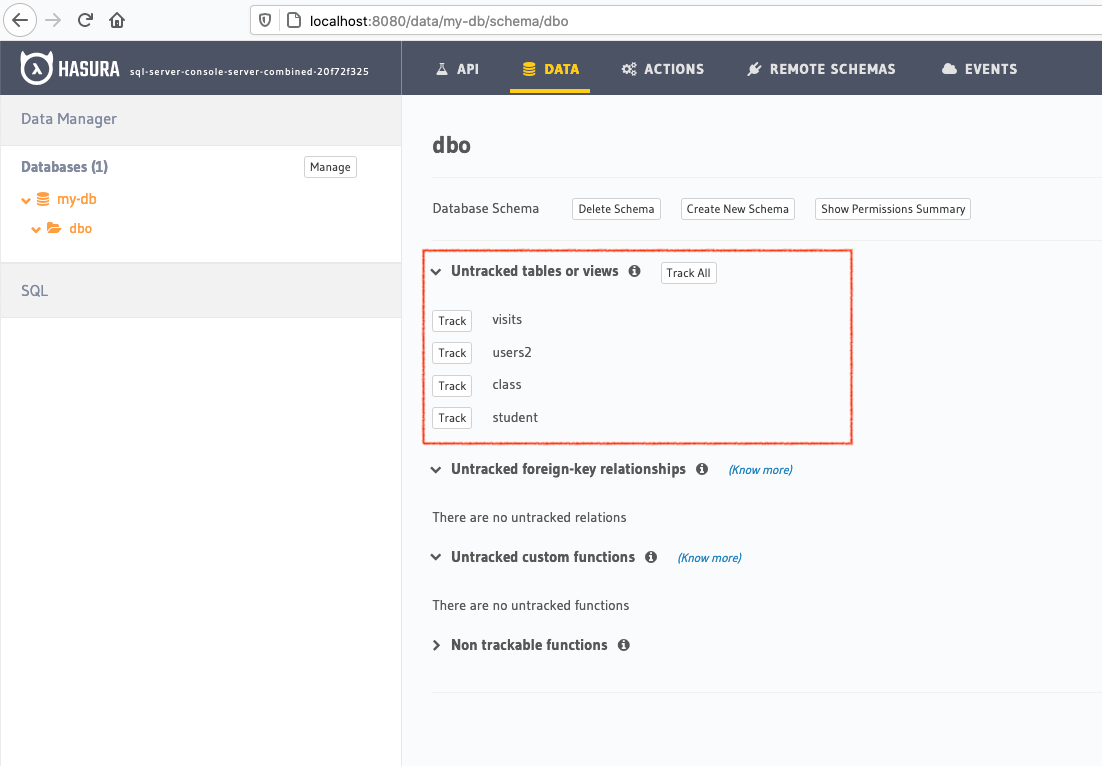
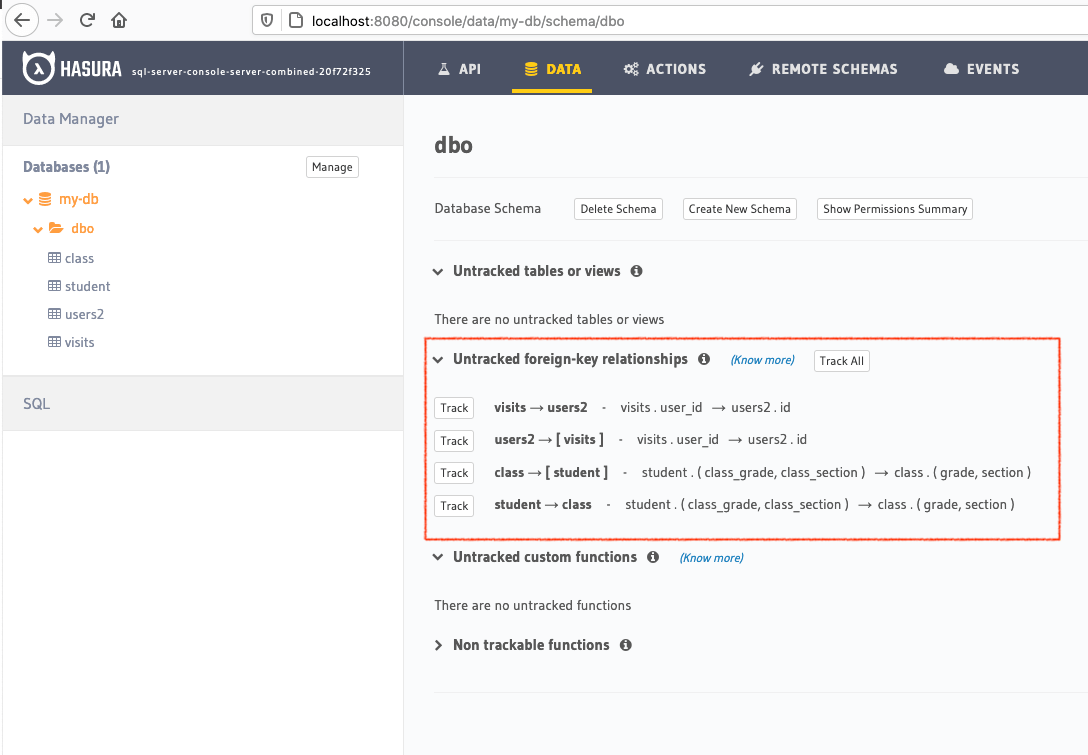
If you have existing tables, head to the database page by clicking on the database name on the sidebar. You should see a list of tables.
Track tables selectively or all of them so that Hasura can introspect the tables and create the corresponding GraphQL schema.
If you have foreign keys, you’ll also see suggested relationships. Again, you can choose to track them selectively or all at once.
Step 3: Option 2: Create new tables
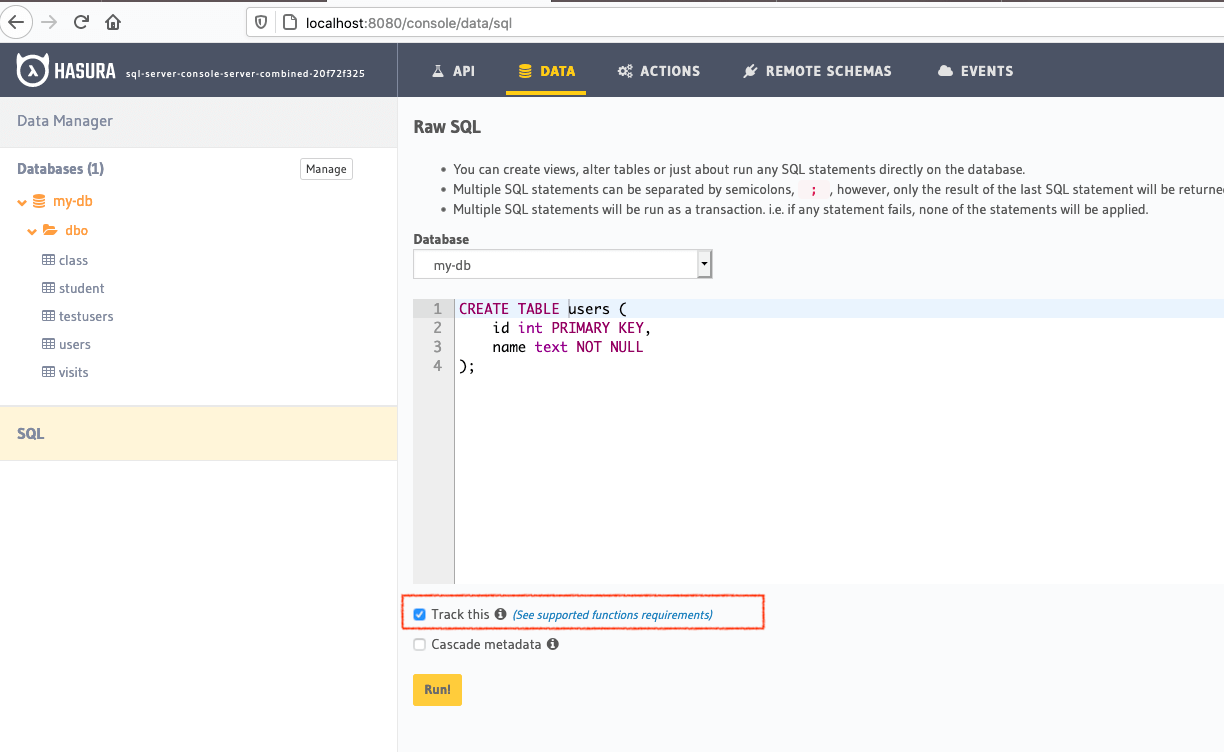
If you don’t have existing tables, head to the Run SQL window to run SQL against your SQL Server database and create tables or hit the Create Table button to create a table.
If you’re running raw SQL queries to create your tables, Don’t forget to check “track metadata” at the bottom of the Run SQL window to make sure Hasura tracks your new database objects in its GraphQL schema.
Step 4: Try out a GraphQL query
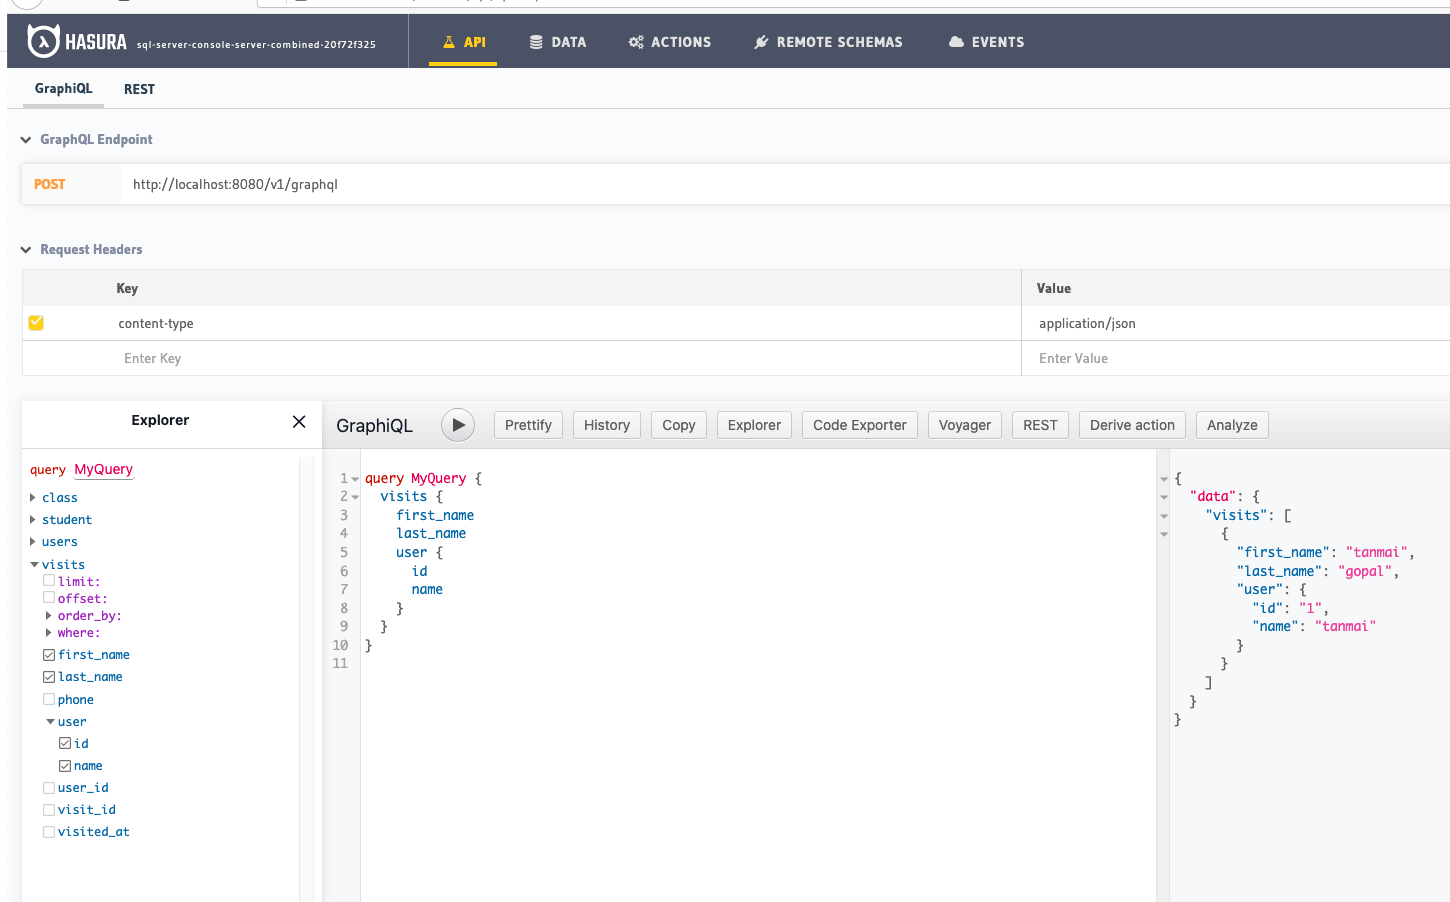
Head to the GraphiQL tab in the console and try running a GraphQL query! Use the explorer sidebar on GraphQL to get help in creating a GraphQL query.
Keep up to date
Hasura supports queries, subscriptions, relationships and permissions on MS SQL Server.
Please watch this space to get the latest docs on how you can try these features out via the console or by manipulating metadata in JSON/YAML directly.
If you’d like to stay informed about the status of SQL Server support, subscribe to our newsletter and join our discord!
Additional Resources
This Hands-on Demo walks you through Getting Started with Hasura on SQL Server & common use cases. - View Recording here.
